SVEGLIA
SMART WIRELESS
TM-2201
USER MANUAL
Techmade S.r.l.
P.N.:/REF.: TM-2201 F.C.:
2201
Description: Wireless smart alarm clock
Working temperature: 0°C to 40°C / 32°F to 104°
F
Warnings
Please read this manual carefully and keep it for future
reference.
All essential test series have been performed and the above
mentioned product complies with all legal requirements.
Limitations in intended use or foreseeable misuse
1. Do not disassemble the device. If repairs are necessary,
contact a Techmade sales center or service center. Techmade is
not liable for consequential damages or damage to property or
persons caused by failure to follow the safety instructions and
improper use of the device.
2. Keep out of reach of children.
3. Use the device only for its intended purposes.
4. Do not use if the device, cord or electrical outlet are
defective or damaged.
5. Keep away from sources of heat or flammable materials, such
as radiators or stoves, from humid or oily environments, such as
bathrooms and swimming pools and from sources of dripping or
splashing liquids, such as bathtubs, showers, sinks or other
containers. Make sure the unit is placed on a dry and stable
surface. Do not immerse in liquids.
6. The device is suitable for indoor and household use only.
7. Before using, make sure that the electrical specifications
match the electrical requirements of the place where it will be
used.
8. Do not leave the device unattended during use.
9. Do not overload the phone. The unit may overheat with
excessive use. Remove the phone when it is fully charged. Never
charge for more than 7 hours.
10. The battery is integrated into the product. To replace it,
contact only competent personnel. Damage to the battery may
cause fire and/or explosion hazard. Dispose of it properly.
(Directive 2006/66/EC on batteries).
Identifying the characteristics of the personnel who will use
the machine (physical, competence) and the level of training
required for users:
No special training for use. Read the user manual.
Product warranty:
24 months warranty for end consumers and 12 months for
professional operators. Opening or attempting to open the
product voids the warranty and may constitute a safety hazard.
Safety related:
Max radio freq. Pow.: 5.16dBuA/m
Handle the device gently. Protect the device from impacts and
drops.
Do not dispose of the device in a fire.
Cleaning level:
Remove from the electrical outlet. Do not attempt to clean
the unit with chemical solvents, as this may damage the finish.
Wipe with a clean, dry or slightly damp cloth. Do not clean the
inside of the device.
Drying:
Do not attempt to dry the product using a microwave oven,
traditional oven or a hair dryer. Use a dry cloth or a light
detergent.
WEEE Instructions
The European Directive 2012/19/EU on waste electrical and
electronic equipment (WEEE) requires that these devices should
not be disposed of in the normal municipal solid waste stream,
but that they should be collected separately to optimize the
recovery and recycling flow of the materials they are made of
and prevent potential damage to health and the environment due
to the presence of potentially dangerous substances. The
crossed-out bin symbol is shown on all products to remind you of
this. The waste can be taken to the appropriate collection
centers, or can be delivered free of charge to the distributor
when purchasing a new equivalent device or without obligation to
purchase for devices smaller than 25cm.
For further information on the correct disposal of these
devices, you can contact the relevant public service.

 |
WASTE SORTING |
| FOLLOW THE INDICATIONS OF
YOUR MUNICIPALITY |
|
| Package
- Paper PAP22 |
Technical specifications
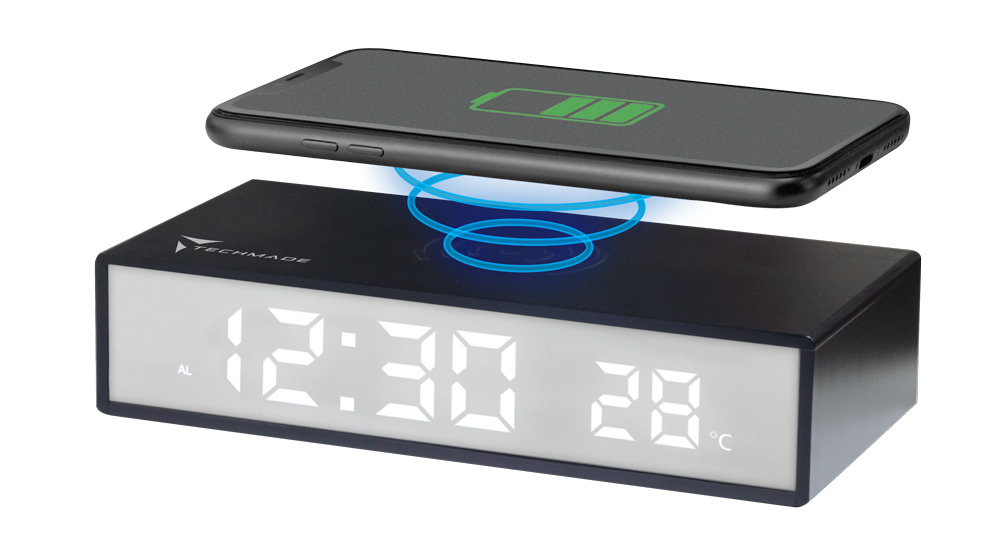
Wireless charger with alarm clock and touch LED lamp
- LED Display
- Wireless charging function for electronic devices such as
smartphone (equipped with wireless charging)
- Ambient temperature detection
- Dimensions: 170mm*80mm*38mm
- Wireless charging: 15W
- USB-C input: 5V ⎓ 2A; 9V ⎓ 2A; 12V ⎓ 1.5A | 18W max
- Battery: CR2032*
*The battery is not removable
Instructions for use
Wireless Charging
1) Make sure the device to be charged is correctly positioned on
the charging area
2) Connect the SMART ALARM CLOCK to the power supply via a
suitable charger (5V ⎓ 2A; 9V ⎓ 2A; 12V ⎓ 1.5A | 18W max)
3) Make sure the device to be charged is compatible with
wireless charging.
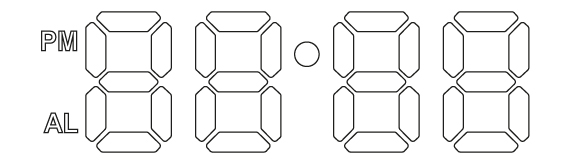
Led display
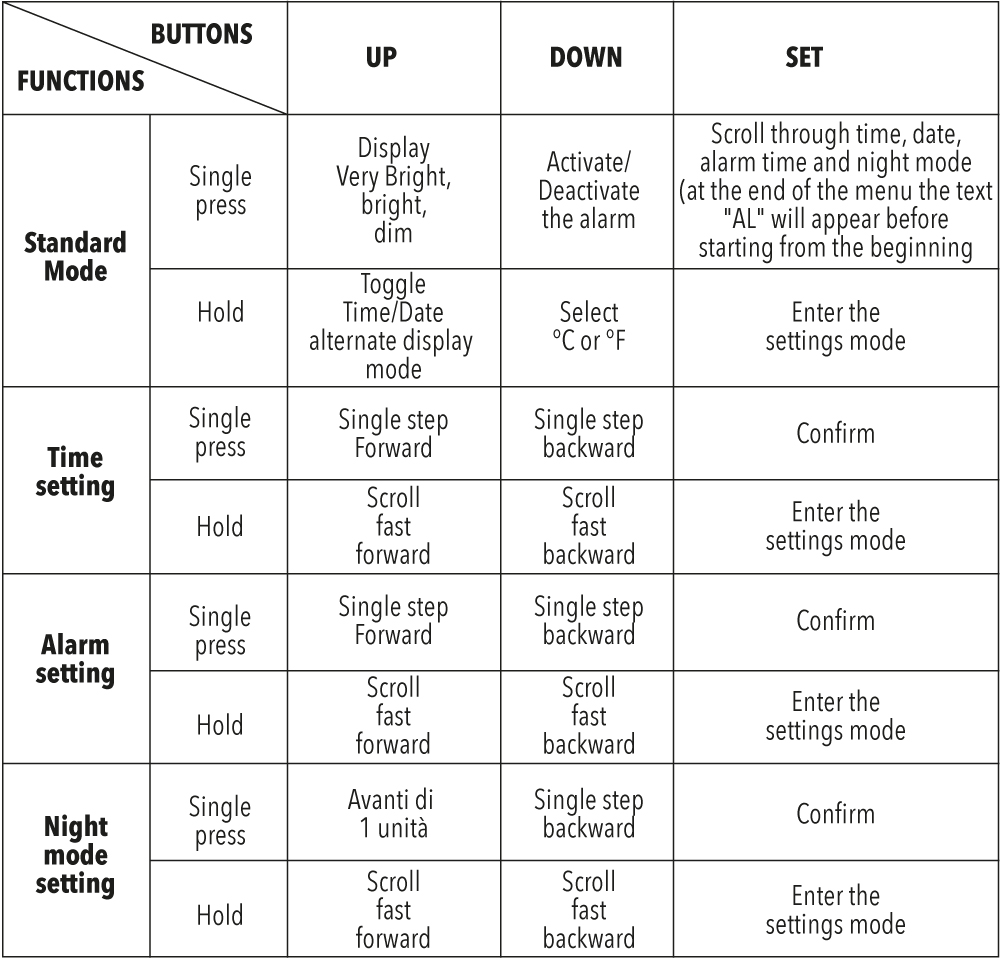
Buttons/Functions
Time setting
When the time is displayed, press the “SET” button for 2 seconds
to enter the setting mode. The hour section will start flashing
first, after confirming, the minute section will start flashing.
When the Hour/Minute section starts flashing, press the
“UP/DOWN” button once to advance/reverse one unit or hold the
“UP/DOWN” button to scroll quickly.
To confirm, continue to press the “SET” button until it returns
to the time display or do not press any button for 10 seconds
for automatic confirmation.
Date Setting
During the date display, press the “SET” button for 2 seconds to
enter the setting mode. The year section will start flashing
first, after confirming, the month section will start flashing
and then the day section.
When the year/month/day section starts flashing, press the
“UP/DOWN” button once to advance/reverse one unit or hold the
“UP/DOWN” button to scroll quickly.
To confirm, continue to press the “SET” button until it returns
to the time display or do not press any button for 10 seconds
for automatic confirmation.
Alarm/Snooze Setting
Press the “Down” button to activate/deactivate the alarm.
When the alarm time is displayed, press the “SET” button for 2
seconds to enter the setting mode (the text “AL” will flash).
The hour section will start flashing first, after confirming,
the minute section will start flashing.. After that, the snooze
setting screen will appear (from “05” to “60” minutes).
When the Hour/Minute/Snooze section starts flashing, press the
“UP/DOWN” button once to advance/reverse one unit or hold the
“UP/DOWN” button to scroll quickly.
To confirm, continue to press the “SET” button until it returns
to the time display or do not press any button for 10 seconds
for automatic confirmation.
When the alarm sounds, press the “SET” button to activate the
snooze.
N.b.:
-The alarm will ring continuously for 2 minutes;
-The default delay is set to 5 min;
-The number of delays is unlimited
Night Mode Setting
The display will automatically dim
During the time display, press the “SET” button twice to
activate/deactivate the night mode. The display will show the
text “ON”/”OFF” if the mode is active/deactivated.
Press the “UP”/”DOWN” button to activate/deactivate.
To set the time range of the night mode, after activating it, so
when the text “ON” appears, press the “SET” button for 2
seconds.
When the Hour/Minute section starts flashing, press the
“UP/DOWN” button once to advance/reverse one unit or hold the
“UP/DOWN” button to scroll quickly.
-When setting the time for the start of the night mode range,
the upper dot of the symbol “:” will flash
-When setting the time for the end of the night mode range, the
lower dot of the symbol “:” will flash
To confirm, continue to press the “SET” button until it returns
to the time display or do not press any button for 10 seconds
for automatic confirmation.
N.B.:
- The Night mode is set to OFF by default
- The default set period is from 18:00 to 6:00
Other functions
- From the main screen, press the “UP” button to adjust the
display brightness between very bright, bright and dim
- From the main screen, press and hold the “UP” button to
activate/deactivate the Time/Date alternating display mode
- From the main screen, press and hold the “DOWN” button to
select the temperature unit between °C and °F.

| SAFETY | EN IEC 62368-1: 2020+A11:2020 + |
| EMC | EN 301 489-1 V2.2.3 + |
| EN 301 489-3 V2.1.1 + |
|
| EN 55014-1:2021 + |
|
| EN IEC 55014-2:2021 + |
|
| RADIO | ETSI EN 303 417 V1.1.1 |
| HEALTH | EN IEC 62311:2020 |
